|
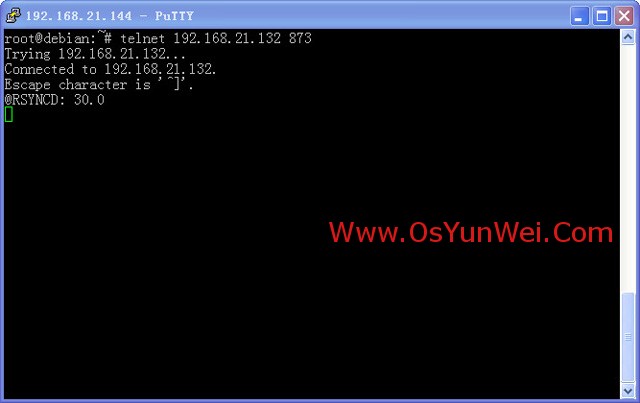
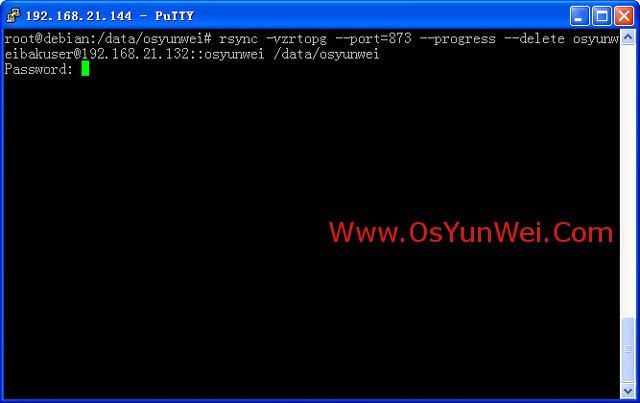
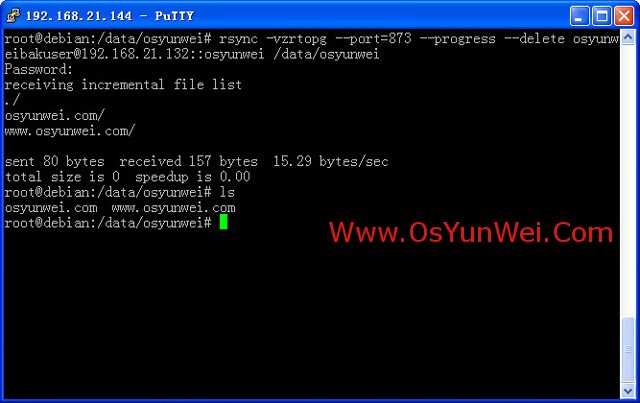
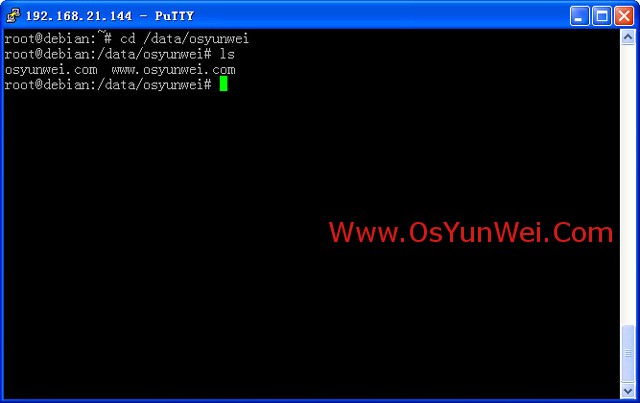
说明: 1、Rsync服务端 系统:CentOS 6.3 IP地址:192.168.21.132 数据存放目录:/data/osyunwei 2、Rsync客户端 系统:Debian 6.0.5 IP地址:192.168.21.144 同步的目录:/data/osyunwei 实现目的: Rsync客户端每天凌晨3:00自动同步Rsync服务端/data/osyunwei目录中的数据到自己的/data/osyunwei目录 一、Rsync服务端配置 1、关闭SELINUX vi /etc/selinux/config #编辑防火墙配置文件 #SELINUX=enforcing #注释掉 #SELINUXTYPE=targeted #注释掉 SELINUX=disabled #增加 :wq! #保存,关闭 shutdown -r now #重启系统 2、开启防火墙tcp 873端口(Rsync默认端口) vi /etc/sysconfig/iptables #编辑防火墙配置文件 -A RH-Firewall-1-INPUT -m state --state NEW -m tcp -p tcp --dport 873 -j ACCEPT :wq! #保存 /etc/init.d/iptables restart #最后重启防火墙使配置生效 3、安装Rsync服务端软件 yum install rsync xinetd #安装 vi /etc/xinetd.d/rsync #编辑配置文件,设置开机启动rsync disable = no #修改为 /etc/init.d/xinetd start #启动(CentOS中是以xinetd来管理Rsync服务的) 系统运维 www.osyunwei.com 温馨提醒:qihang01原创内容©版权所有,转载请注明出处及原文链接 4、创建rsyncd.conf配置文件 vi /etc/rsyncd.conf #创建配置文件,添加以下代码 log file = /var/log/rsyncd.log #日志文件位置,启动rsync后自动产生这个文件,无需提前创建 [osyunwei] #自定义名称 path = /data/osyunwei #Rsync服务端数据目录路径 comment = osyunwei #模块名称与[osyunwei]自定义名称相同 uid = root #设置rsync运行权限为root gid = root #设置rsync运行权限为root port=873 #默认端口 read only = yes #设置Rsync服务端文件为只读 auth users = osyunweibakuser #执行数据同步的用户名,可以设置多个,用英文状态下逗号隔开 secrets file = /etc/rsync.pass #用户认证配置文件,里面保存用户名称和密码,后面会创建这个文件 hosts allow = 192.168.21.144 #允许进行数据同步的客户端IP地址,可以设置多个,用英文状态下逗号隔开 hosts deny = 192.168.21.254 #禁止数据同步的客户端IP地址,可以设置多个,用英文状态下逗号隔开 list = yes #显示Rsync服务端资源列表 :wq! #保存,退出 5、创建用户认证文件 vi /etc/rsync.pass #配置文件,添加以下内容 osyunweibakuser:123456 #格式,用户名:密码,可以设置多个,每行一个用户名:密码 :wq! #保存,退出 6、设置文件权限 chmod 600 /etc/rsyncd.conf #设置文件所有者读取、写入权限 chmod 600 /etc/rsync.pass #设置文件所有者读取、写入权限 7、启动rsync /etc/init.d/xinetd start #启动 service xinetd stop #停止 service xinetd restart #重新启动 二、Rsync客户端安装 1、开启防火墙tcp 873端口(Rsync客户端不需要开启873端口,这里开启是为了方便以后作为Rsync服务端) 说明:Debian默认安装是没有开启任何防火墙的 为了服务器的安全,建议大家安装启用防火墙设置,这里推荐使用iptables防火墙 whereis iptables #查看系统是否安装防火墙 iptables: /sbin/iptables /usr/share/iptables /usr/share/man/man8/iptables.8.gz #表示已经安装iptables防火墙 apt-get install iptables #如果默认没有安装,请运行此命令安装防火墙 iptables -L #查看防火墙配置信息,显示如下: ##################################################### Chain INPUT (policy ACCEPT) target prot opt source destination Chain FORWARD (policy ACCEPT) target prot opt source destination Chain OUTPUT (policy ACCEPT) target prot opt source destination ##################################################### nano /etc/iptables.default.rules #设置防火墙规则,添加以下内容###############################################################################*filter# Allows all loopback (lo0) traffic and drop all traffic to 127/8 that doesn't use lo0-A INPUT -i lo -j ACCEPT# Accepts all established inbound connections-A INPUT -m state --state ESTABLISHED,RELATED -j ACCEPT# Allows all outbound traffic# You could modify this to only allow certain traffic-A OUTPUT -j ACCEPT# Allows HTTP and MySQLconnections from anywhere (the normal ports for websites)-A INPUT -p tcp --dport 80 -j ACCEPT-A INPUT -p tcp --dport 3306 -j ACCEPT-A INPUT -p tcp --dport 873 -j ACCEPT# Allows SSH connections for script kiddies# THE -dport NUMBER IS THE SAME ONE YOU SET UP IN THE SSHD_CONFIG FILE-A INPUT -p tcp -m state --state NEW --dport 22 -j ACCEPT# Now you should read up on iptables rules and consider whether ssh access# for everyone is really desired. Most likely you will only allow access from certain IPs.# Allow ping-A INPUT -p icmp -m icmp --icmp-type 8 -j ACCEPT# log iptables denied calls (access via 'dmesg' command)-A INPUT -m limit --limit 5/min -j LOG --log-prefix "iptables denied: " --log-level 7# Reject all other inbound - default deny unless explicitly allowed policy:-A INPUT -j REJECT-A FORWARD -j REJECTCOMMIT############################################################################### ctrl+o #保存 ctrl+x #退出 备注:873是Rsync端口 iptables-restore < /etc/iptables.default.rules #使防火墙规则生效 nano /etc/network/if-pre-up.d/iptables #创建文件,添加以下内容,使防火墙开机启动 #!/bin/bash /sbin/iptables-restore </etc/iptables.default.rules ctrl+o #保存 ctrl+x #退出 chmod +x /etc/network/if-pre-up.d/iptables #添加执行权限 2、安装Rsync客户端软件 whereis rsync #查看系统是否已安装rsync,出现下面的提示,说明已经安装 rsync: /usr/bin/rsync /usr/share/man/man1/rsync.1.gz apt-get install rsync #如果没有安装,请执行这行命令来安装rsync nano /etc/default/rsync #编辑配置文件 RSYNC_ENABLE=true #把false改为true,设置开机启动rsync ctrl+o #保存 ctrl+x #退出 /etc/init.d/rsync start #启动 service rsync stop #停止 service rsync restart #重新启动 3、测试Rsync客户端是否与Rsync服务端通信成功 apt-get install telnet #安装telnet工具 telnet 192.168.21.132 873 #输入命令后回车,如下图所示,表示通信成功 三、设置Rsync客户端与Rsync服务端同步数据(以下操作在Rsync客户端进行) 1、测试数据同步,在终端命令行输入 rsync -vzrtopg --port=873 --progress --delete osyunweibakuser@192.168.21.132::osyunwei /data/osyunwei 提示输入密码:123456 注意:此处的密码为Rsync服务端/etc/rsync.pass文件配置的密码 回车之后,图下图所示,表示数据同步成功 系统运维 www.osyunwei.com 温馨提醒:qihang01原创内容©版权所有,转载请注明出处及原文链接 cd /data/osyunwei #进入数据同步目录 ls #显示文件信息 可以看到数据已经存在了 2、添加计划任务,每天自动执行数据同步脚本 nano /etc/passwd.txt #配置文件,添加以下内容 123456 #密码 ctrl+o #保存 ctrl+x #退出 chmod 600 /etc/passwd.txt #设置文件权限,只设置文件所有者具有读取、写入权限即可 cd /home nano osyunweibak.sh #编辑,添加以下内容 #!/bin/sh rsync -vzrtopg --port=873 --progress --delete osyunweibakuser@192.168.21.132::osyunwei /data/osyunwei --password-file=/etc/passwd.txt ctrl+o #保存 ctrl+x #退出 chmod +x /home/osyunweibak.sh #添加脚本直接权限 3、添加计划任务 系统运维 www.osyunwei.com 温馨提醒:qihang01原创内容©版权所有,转载请注明出处及原文链接 修改/etc/crontab nano /etc/crontab #在下面添加 0 3 * * * root /home/osyunweibak.sh #表示每天凌晨3点执行备份 ctrl+o #保存 ctrl+x #退出 6、重新启动crond使设置生效 service cron stop #停止 service cron start #启动 /etc/init.d/cron restart #重启 chkconfig cron on #设为开机启动,先要安装chkconfig(apt-get install chkconfig) 至此,CentOS 6.3 Rsync服务端与Debian 6.0.5 Rsync客户端实现数据同步完成 以上就是CentOS 6.3 Rsync服务端与Debian 6.0.5 Rsync客户端实现数据同步的详细内容,更多相关资料请阅读琼殿技术社区其它文章! |



 發表於 2025-3-22 00:00:00