|
1. 初始化项目
npm init 生成 package.json 文件
{
  "name": "node.redis",
  "version": "1.0.0",
  "description": "",
  "main": "index.js",
  "scripts": {
    "test": "echo \"Error: no test specified\" && exit 1"
  },
  "author": "",
  "license": "ISC"
}
2. 安装 node 模块的 ts 声明文件
npm install --save typescript (需要确认)
npm i --save @types/node
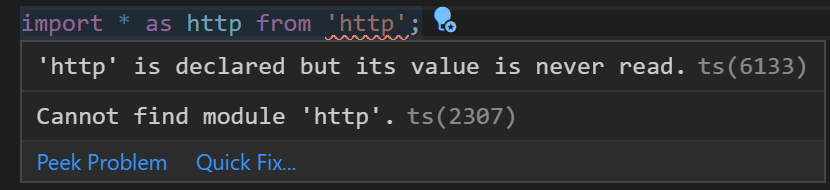
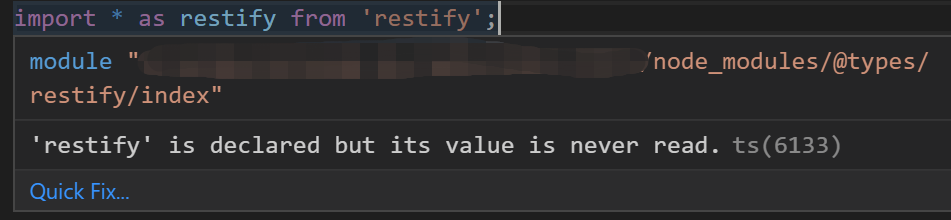
安装 @types/node 以后, node 会有对应的ts 声明,并且 vscode 可以提供相应的代码感知
安装前:
安装后:

3. npm 第三方库 的 ts 支持
以 restify 为例.
3.1. 安装 restify 依赖
npm i --save restify
server.js 中引用 restify 成功:
server.ts 中 import restify 时失败,此时还没有安装 restify 的 ts 引用.
3.2 安装 restify ts 依赖.(为js 库,提供 index.d.ts 声明)
npm i --save @types/restify
4. 编译 运行 ts 项目
4.1 编译 ts
生成 tsconfig.json 文件: tsc --init
{
  "compilerOptions": {
      "module": "commonjs", //指定生成哪个模块系统代码
      "target": "es6", //目标代码类型
      "noImplicitAny": false, //在表达式和声明上有隐含的'any'类型时报错。
      "sourceMap": true, //用于debug
      "rootDir": "./src", //根目录
      "outDir": "./build", //重定向输出目录。
      "watch": true //在监视模式下运行编译器。会监视输出文件,在它们改变时重新编译。
  }
}
4.2 vscode 编译
菜单 -> 任务 -> Run Build task -> tsc: build - tsconfig.json;
运行 node build/server.js
4.3 使用 ts-node
安装 ts-node: npm install -g ts-node
配置 vscode 调试 launch.json
{
    // Use IntelliSense to learn about possible attributes.
    // Hover to view descriptions of existing attributes.
    // For more information, visit: https://go.microsoft.com/fwlink/?linkid=830387
    "version": "0.2.0",
    "configurations": [
        {
            "name": "调试 TS Node 程序 - args",
            "type": "node",
            "request": "launch",
            "runtimeExecutable": "node",
            "runtimeArgs": [
                "-r",
                "ts-node/register"
            ],
            "args": [
                "${workspaceFolder}/src/index.ts"
            ]
        }
    ]
}
参考:https://www.barretlee.com/blog/2019/03/18/debugging-in-vscode-tutorial/
来源:https://www.cnblogs.com/xubd/p/12244523.html |



 發表於 2020-1-31 13:10:00