|
摘要:使用原生js,html,css封装web component比较麻烦,在angular 10.0中,提供了一种使用angular elements把angular component转换成web component的能力。
这是一篇介绍如何使用angular创建web component的文章。
你将会看到:
-
使用angular创建web component的原理
-
如何使用angular创建web component
-
新建angular工程
- 删除app.component组件及更新app.module
-
安装依赖包:angular custom elements
-
新建angular component
-
添加到entryComponent中
-
使用createCustomElement()函数创建自定义元素
-
使用customElements.define()函数把自定义元素挂载到浏览器上的customElementRestory
-
打包项目
-
优化打包过程
-
在原本的angular项目中使用
-
在其他angular项目中使用
-
在普通的html中使用
-
在react项目中使用
- 使用angular来封装web component的一些问题
-
如何使用web component实现微前端
版本:
demo使用的是新版 angular 10.04版本。
一. 工作原理:
angular提供了createCustomElement()函数,它把angular component的各种功能转换成web component标准的各种接口。
然后使用原生的customElements.define()函数把自定义的元素注册到浏览器的CustomElementRegistry中。
这样,当页面上出现这个自定义的元素时,浏览器会把CustomElementRegistry中的相对应的元素实例化,实例化出的对象其实是使用angular component的语法,包括数据绑定和变更检测。
二. 具体步骤:
1.新建angular工程:ng new custom-elements-demo
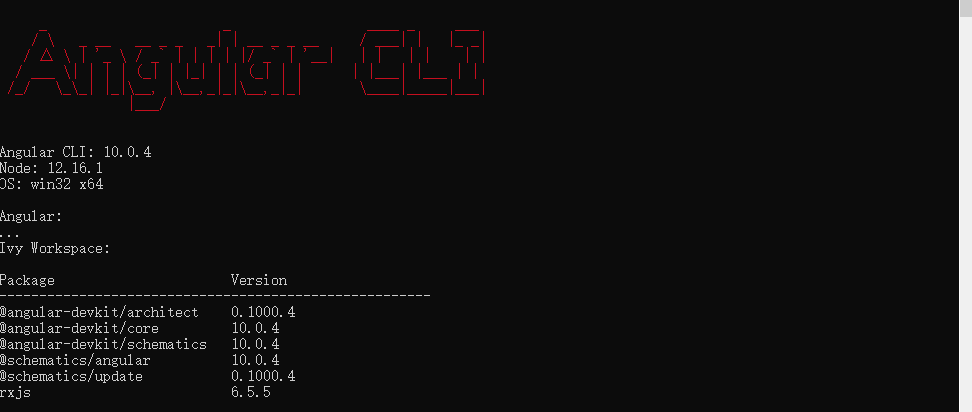
执行:ng new custom-elements-demo
等待安装包完成:
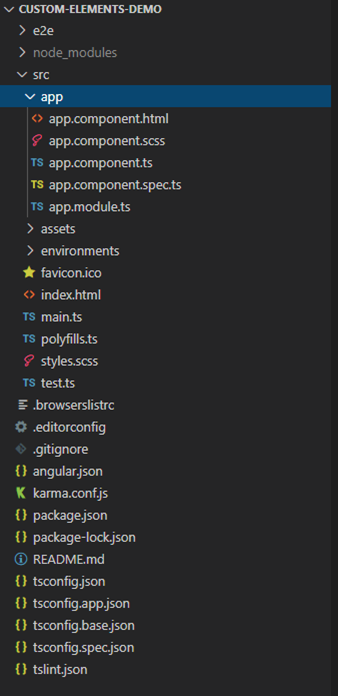
看一下现在的目录结构:
项目初始化已经完成了。
此处正常情况应该有叹息的,毕竟安装包需要挺长长长长时间的的的的~~~
2.删除不必要的app.component
在原来的angular项目中,app.component是作为入口组件的,现在我们只是为了生成web component,就没有必要有入口组件了。删除与app.component相关的内容。
-
删除src/app/app.component.html
-
删除src/app/app.component.scss
-
删除src/app/app.component.ts
-
删除src/app/app.component.spec.ts
-
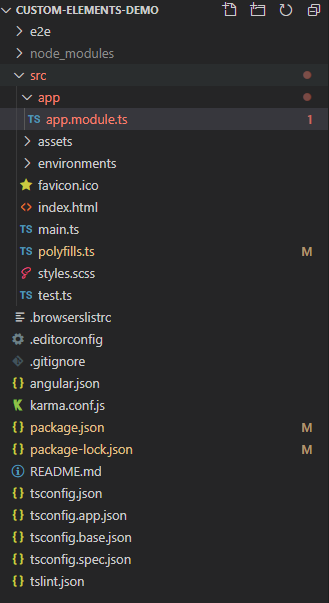
更新src/app/app.module.ts
目录结构:
app.module.ts内容
import { BrowserModule } from '@angular/platform-browser';
import { NgModule } from '@angular/core';

@NgModule({
  declarations: [],
  imports: [
    BrowserModule
  ],
  providers: [],
  bootstrap: []
})
export class AppModule { }
3.安装依赖包:ng add @angular/elements
@angular/elements是angular自定义元素的工具包,我们来安装一下。
执行:ng add @angular/elements
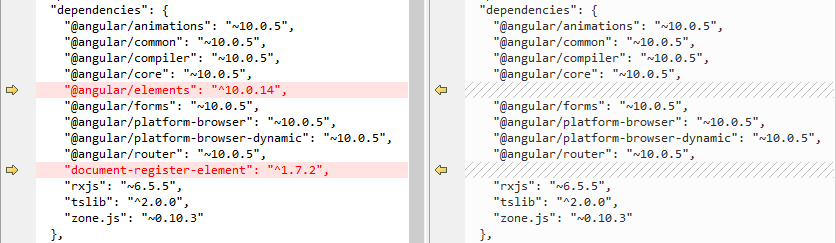
可以看到,当你安装@angular/elements,会默认安装document-register-element腻子脚本,并且添加到src/polyfills.ts中。
那么为什么需要添加腻子脚本呢?原因是:目前不是所有浏览器都支持自定义元素的,要想让不支持自定义元素的浏览器正常使用,需要添加腻子脚本。
我们来对比一下代码:
会安装2个依赖:@angular/elements和document-register-element
修改了src/polyfills.ts这个文件,添加腻子脚本到项目中。
4.新建angular component: ng g c custom-card
新建一个空的angular component
执行: ng g c custom-card
完成custom-card组件,这里就直接贴一下代码了。
custom-card.component.html
1 <span>{{name}}</span>
2 <div class="info">
3     <span>{{info.age}}</span>
4     <span>{{info.phone}}</span>
5 </div>
6 <button class="select" (click)="onSelectUser()">选择用户</button>
custom-card.component.scss
 1 :host {
 2     display: flex;
 3     flex-direction: column;
 4     width: 200px;
 5     height: 200px;
 6     border: 1px solid gray;
 7
 8     padding: 20px;
 9     .info {
10         padding: 20px;
11         span {
12             display: block;
13         }
14     }
15 }
custom-card.component.ts
import { Component, OnInit, Input, Output, EventEmitter } from '@angular/core';
import { UtilService } from '../util.service';
@Component({
  selector: 'app-custom-card',
  templateUrl: './custom-card.component.html',
  styleUrls: ['./custom-card.component.scss']
})
export class CustomCardComponent implements OnInit {
  @Input() name = '';
  @Input() info = {
    age: 0,
    phone: ''
  };
  @Output() selectUser = new EventEmitter();

  constructor(
    private util: UtilService
  ) { }
  ngOnInit(): void {
    this.util.log();
  }
  onSelectUser(): void {
    this.selectUser.emit({...this.info, name: this.name});
  }
}
这里card显示user的name age phone,其中name是单独作为字符串传递进card 组件的,而age 和 phone是包装在info对象中的,只是为了演示传递值的区别。
当用户点击选择user的button时,会把当前的user信息发送出来,这是为了演示怎么响应web component的事件。
5.添加到entryComponent
有一类组件被包含在模板中,它们是声明式加载的;另一类组件你会命令式加载它,这就是入口组件。对于入口组件,需要添加到module.entryComponent中。
app.module.ts
import { BrowserModule } from '@angular/platform-browser';
import { NgModule } from '@angular/core';
import { CustomCardComponent } from './custom-card/custom-card.component';

@NgModule({
  declarations: [CustomCardComponent],
  imports: [
    BrowserModule
  ],
  providers: [],
  bootstrap: [],
  entryComponents: [CustomCardComponent]
})
export class AppModule { }
6.使用createCustomElement()函数创建自定义元素
@angular/elements包导出的createCustomElement()函数原来把angular component转换成浏览器能够识别的自定义元素。
const customCardEle = createCustomElement(CustomCardComponent, {injector});
7.使用customElements.define()函数把自定义元素挂载到浏览器上的customElementRestory
customElements.define('custom-card', customCardEle);
第一个参数是自定义元素的tag名称,第2个参数就是自定义元素。
创建自定义元素的代码放在哪里?
angular项目都需要有一个启动组件,一般的angular项目定义在NgModule.bootstrap中,对于对于web component的组件,NgModule.bootstrap是空的。
这个时候,启动组件其实是AppModule这个类中的ngDoBootstrap()函数,我们可以把定义web component的代码放到这个函数中。
import { BrowserModule } from '@angular/platform-browser';
import { NgModule, Injector } from '@angular/core';
import { createCustomElement } from '@angular/elements';
import { CustomCardComponent } from './custom-card/custom-card.component';

@NgModule({
  declarations: [CustomCardComponent],
  imports: [
    BrowserModule
  ],
  providers: [],
  bootstrap: [],
  entryComponents: [CustomCardComponent]
})
export class AppModule {
  constructor(
    private injector: Injector
  ) {
  }
  ngDoBootstrap(): void {
    const customCardEle = createCustomElement(CustomCardComponent, {injector: this.injector});
    customElements.define('custom-card', customCardEle);
  }
}
至此,在angular中创建web component已经完成了,下面我们来看一下如何打包及使用。
三. 打包项目
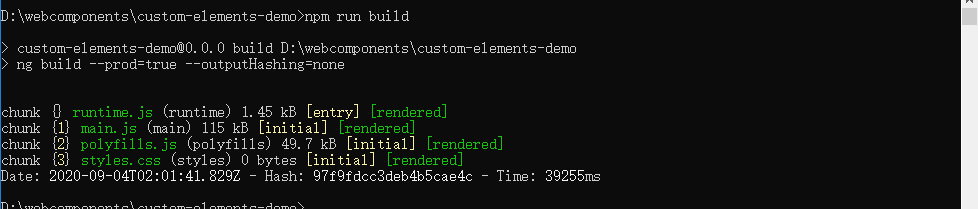
1.执行:ng build --prod=true --outputHashing=none
--prod=true可以让angular优化打包的项目,例如 tree-shaking
--outputHashing=none原本打包的文件名有hash值,使用这个设置可以去掉hash
可以看到生成3个js文件,一个css文件。
我们新建一个html文件,把生成的runtime.js main.js polyfills.js和styles.css导入到这个html中。
test.html
 1 <!DOCTYPE html>
 2 <html lang="en">
 3 <head>
 4     <meta charset="UTF-8">
 5     <meta name="viewport" content="width=device-width, initial-scale=1.0">
 6     <title>Document</title>
 7     <style href="dist/custom-elements-demo/style.css"></style>
 8     <script src="dist/custom-elements-demo/main.js"></script>
 9     <script src="dist/custom-elements-demo/polyfills.js"></script>
10     <script src="dist/custom-elements-demo/runtime.js"></script>
11 </head>
12 <body>
13     <div>
14         <span>正被选择的用户:</span>
15         <span id="user"></span>
16     </div>
17     <custom-card id="1"></custom-card>
18     <custom-card id="2"></custom-card>
19     <script>
20         const user = document.getElementById('user');
21         const card = document.getElementById('1');
22         card.name = 'wt';
23         card.info = {age: 25, phone: '111-222-3333'};
24         card.addEventListener('selectUser', (e) => {
25             user.innerText = e.detail.name;
26         });
27         const card1 = document.getElementById('2');
28         card1.name = 'syc'
29         card1.info = {age: 18, phone: '555-666-3333'};
30         card1.addEventListener('selectUser', (e) => {
31             user.innerText = e.detail.name;
32         });
33     </script>
34 </body>
35 </html>
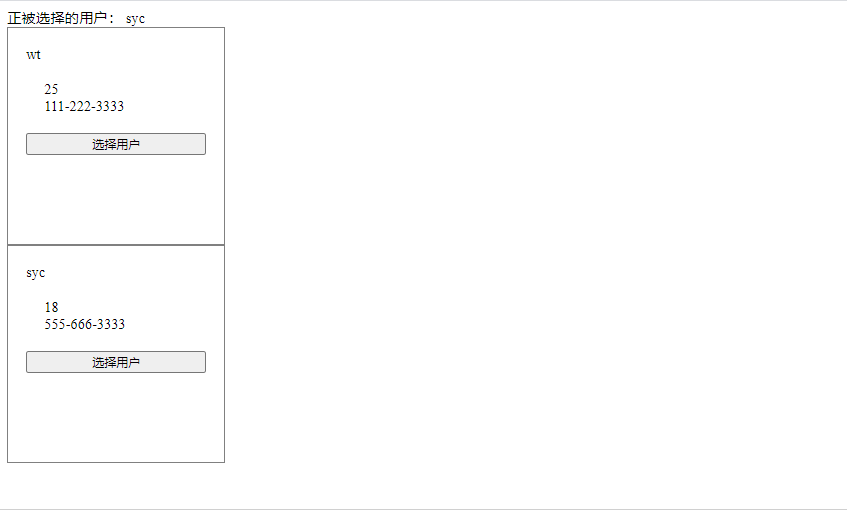
可以看到,custom-card这个web component的使用和一般的html元素并没有区别。
下面是显示的结果:
我们可以看到,默认情况下,angular使用ng build是把项目打成4个文件的,3个js文件和一个css文件,一般的项目使用没问题,但是定义web component项目,4个文件有点不方便,如果只使用一个文件就好了。
我们来使用webpack来再次打包一下,目标是合成一个文件。
修改build 命令: ng build --prod=true --outputHashing=none --single-bundle
来源:https://www.cnblogs.com/JasonWang-code/p/13606137.html |



 發表於 2020-9-10 14:36:00