|
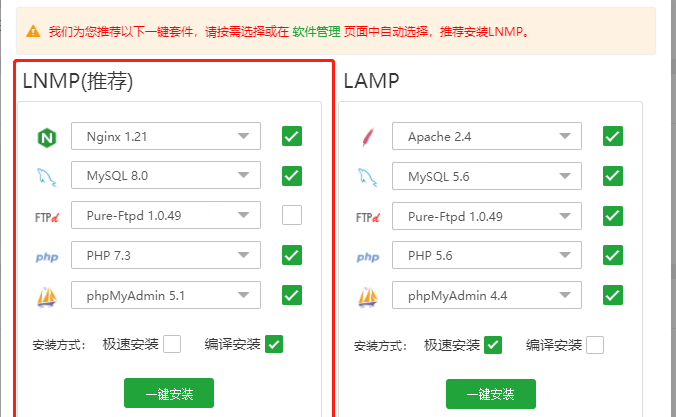
1.宝塔默认软件安装
1.1Nginx需要编译安装
默认版本没有http_secure_link_module 所以需要重新编译安装一遍
打开 /www/server/panel/install 下的nginx.sh,找到 ./configure ,在后面添加 --with-http_secure_link_module
执行 bash nginx.sh install 1.24
下面部分弃用
cd /www/server/nginx/src

./configure \
--user=www \
--group=www \
--prefix=/www/server/nginx \
--with-http_secure_link_module \
--with-http_ssl_module \
--with-http_stub_status_module \
--with-http_realip_module \
--with-stream \
--with-threads

make && make install
1.2安装 Redis
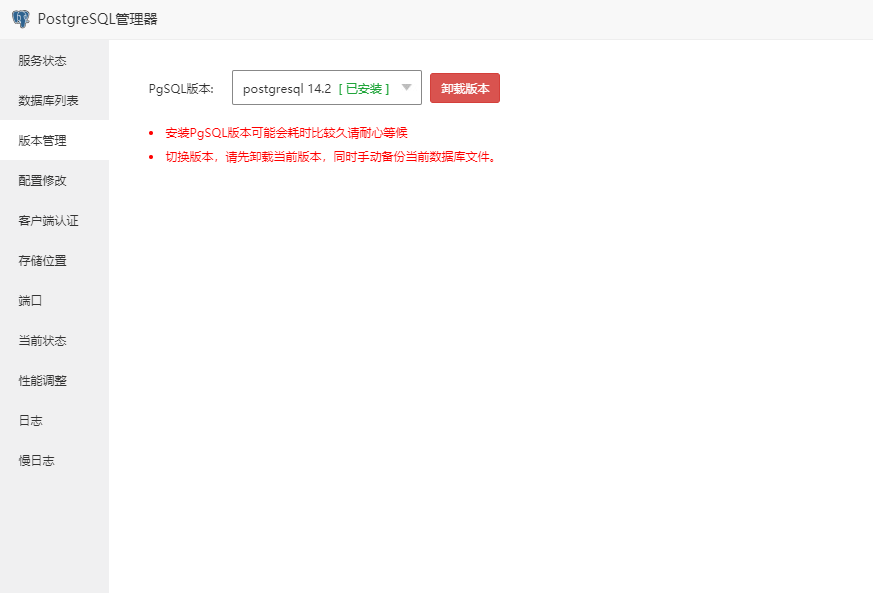
1.3安装 PostgreSQL管理器
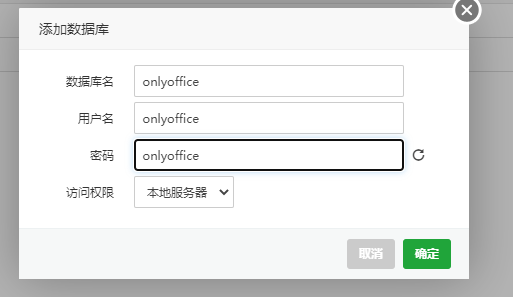
并安装  gSQL,添加数据库 onlyoffice gSQL,添加数据库 onlyoffice
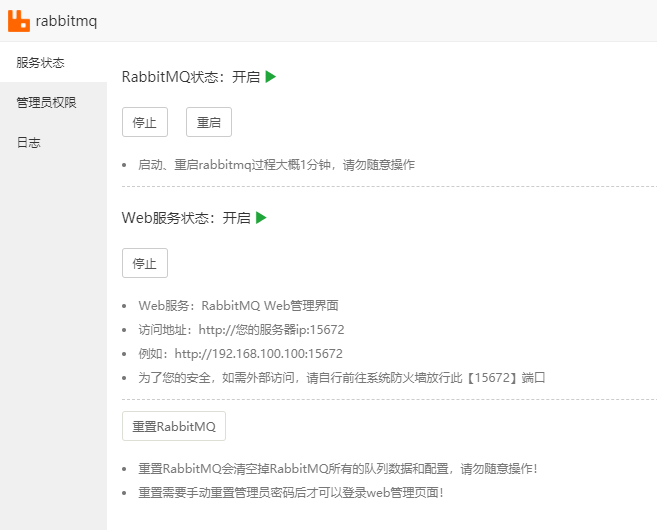
1.4安装rabbitmq
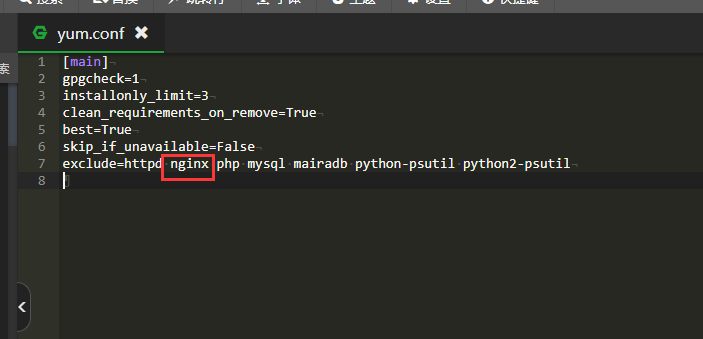
修改/etc/yum.conf
由于宝塔排除了nginx
找到exclude=行删除nginx,否则安装onlyoffice-documentserver时会提示没有安装nginx
2.安装onlyoffce
参考官网
https://helpcenter.onlyoffice.com/installation/docs-community-install-centos.aspx?_ga=2.20962040.1995720888.1647591452-1314819513.1646308835
安装依赖软件
sudo yum install -y epel-release postgresql rabbitmq-server cabextract xorg-x11-font-utils fontconfig
sudo rpm -i https://deac-ams.dl.sourceforge.net/project/mscorefonts2/rpms/msttcore-fonts-installer-2.6-1.noarch.rpm
安装onlyoffce
sudo yum install -y https://download.onlyoffice.com/repo/centos/main/noarch/onlyoffice-repo.noarch.rpm
sudo yum install -y onlyoffice-documentserver
设置supervisord开机启动
/bin/systemctl start supervisord.service
sudo systemctl enable supervisord
设置RabbitMQ开机启动
/bin/systemctl start rabbitmq-server.service
sudo systemctl enable rabbitmq-server
删除Nginx系统服务配置文件
安装onlyoffce时依赖安装,Nginx还是用宝塔的版本,这里直接删除服务文件。
rm -f /usr/lib/systemd/system/nginx.service
设置onlyoffce端口
onlyoffce默认端口可以根据需要修改
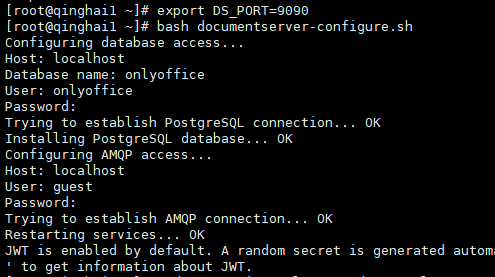
bash documentserver-configure.sh
PostgreSQL:
Host: localhost
Database: onlyoffice
User: onlyoffice
Password: onlyoffice

RabbitMQ:
Host: localhost
User: guest
Password: guest
修改权限
chown -R www:www /var/lib/onlyoffice
sudo usermod -a -G www ds
chmod -R 775 /var/lib/onlyoffice

chown -R www:www /etc/onlyoffice/documentserver/nginx
chown -R www:www /etc/onlyoffice/documentserver-example/nginx
chown -R www:www /etc/nginx
chown -R www:www /var/www
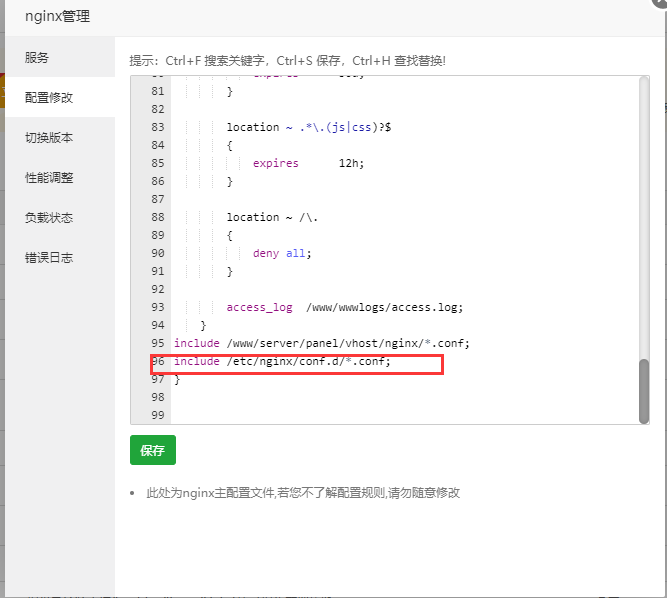
设置Nginx
添加 include /etc/nginx/conf.d/*.conf;
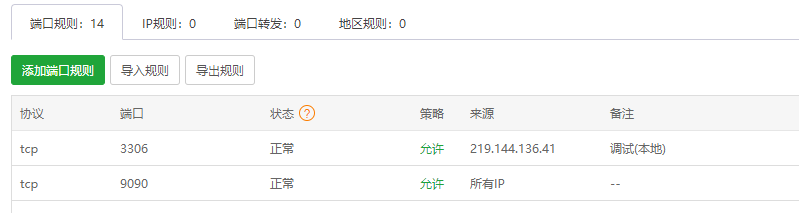
开放9090端口方便访问
重启服务
sudo service supervisord restart
sudo systemctl start ds-example # 运行示例服务
sudo systemctl enable ds-example # 自启动
/etc/init.d/nginx restart #重启nginx
访问示例 http://yourip:9090/
3.onlyoffice配置
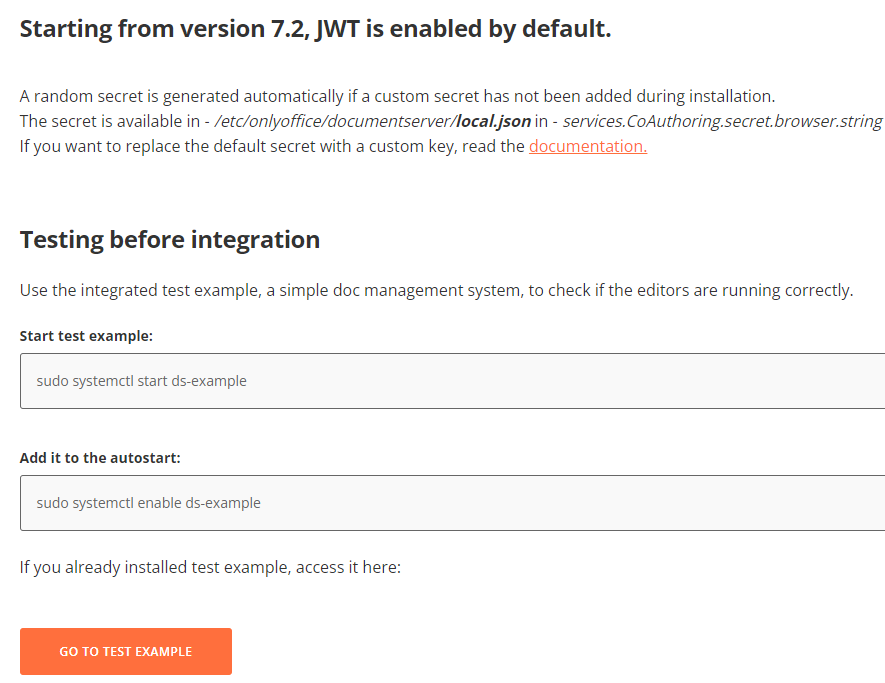
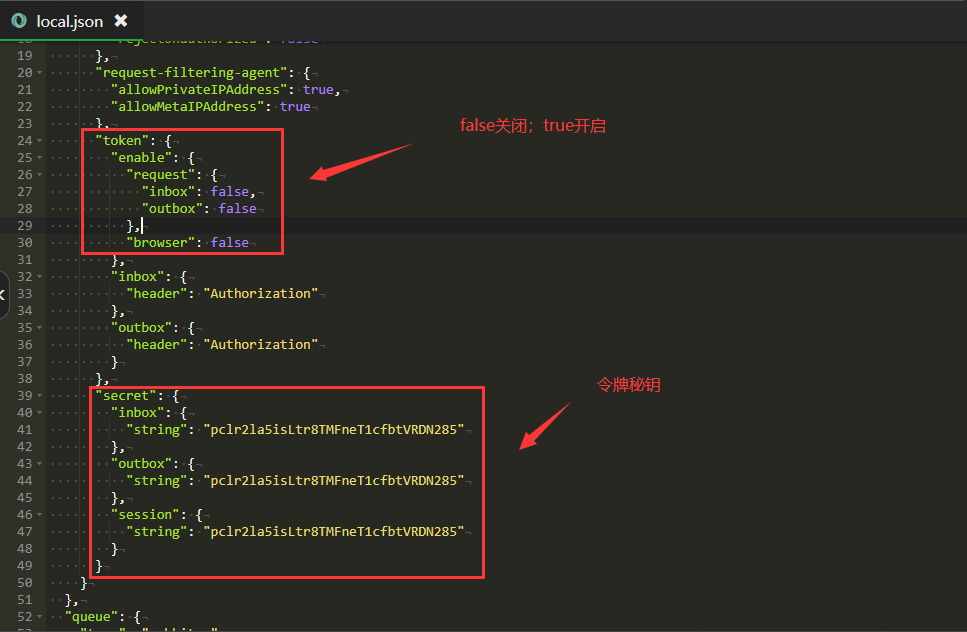
OnlyOffice 关闭密钥(JWT令牌)
/etc/onlyoffice/documentserver/local.json
保存更改。
重启服务,以使配置更改生效。
systemctl restart ds-converter ds-docservice ds-example ds-metrics
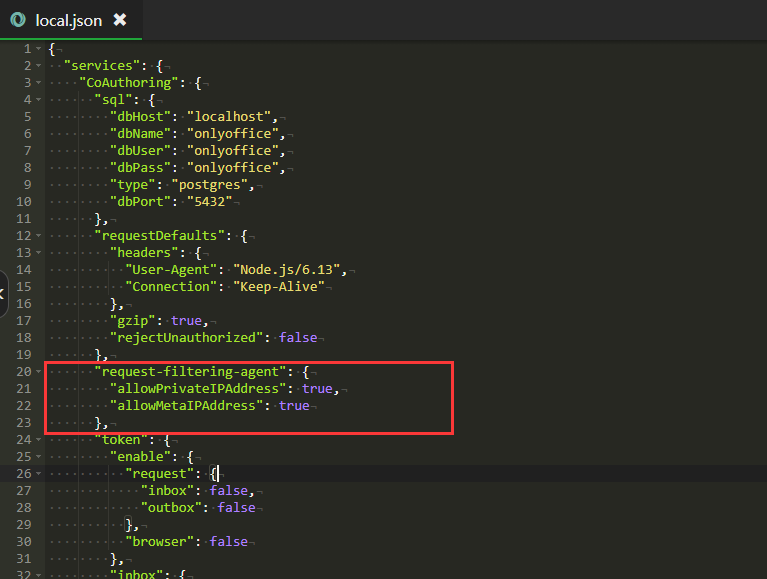
OnlyOffice 下载失败问题
在 local.json 中添加以下设置
  "request-filtering-agent": {
        "allowPrivateIPAddress": true,
        "allowMetaIPAddress": true
   },
添加字体
将字体文件拷贝到如下路径,/usr/share/fonts/
进入 ONLYOFFICE 可执行文件所在的文件夹路径,/usr/bin
运行 ONLYOFFICE Docs 所提供的字体导入脚本程序 ./documentserver-generate-allfonts.sh
客户端清除浏览器缓存后刷新页面
#### onlyoffice二次开发,优化fonts请求速度的问题(待验证)
location ~* /6.4.2-6/fonts(.*){
return http://xxxx.oss-cn-shanghai.aliyuncs.com/xxx/onlyoffice/fonts$1?$args;
}
保存延迟 /etc/onlyoffice/documentserver/local.json
{
    "services": {
        "CoAuthoring": {
            "server": {
                "savetimeoutdelay": 1000
            }
        }
    }
}
设置https
vim /etc/nginx/conf.d/ds.conf

server {
  listen 0.0.0.0:443 ssl;
  listen [::]:443 ssl default_server;
  server_tokens off;
  ssl_certificate onlyoffice.org.crt;
  ssl_certificate_key onlyoffice.org.key;
  ssl_session_timeout 5m;
  ssl_protocols TLSv1 TLSv1.1 TLSv1.2;
  ssl_ciphers ECDHE-RSA-AES128-GCM-SHA256:HIGH:!aNULL:!MD5:!RC4:!DHE;
  ssl_prefer_server_ciphers on;
  include /etc/nginx/includes/ds-*.conf;
}
来源:https://www.cnblogs.com/logan47537/p/17934796.html |



 發表於 2023-12-29 14:48:00