导航到Profiles,然后单击加号按钮注册新的配置文件。
选择“iOS 应用程序开发”选项,然后单击“继续”按钮。
选择您的应用程序 ID,然后单击“继续”按钮。
选择所有证书并单击“继续”按钮。
选择您的设备并单击“继续”按钮。
输入您的配置文件的名称,然后单击“生成”按钮。
单击“下载”按钮。然后双击以下文件来安装您的配置文件,发布证书也是相同流程。
Xcode 配置
选择您在前面的步骤中下载并安装的配置文件。
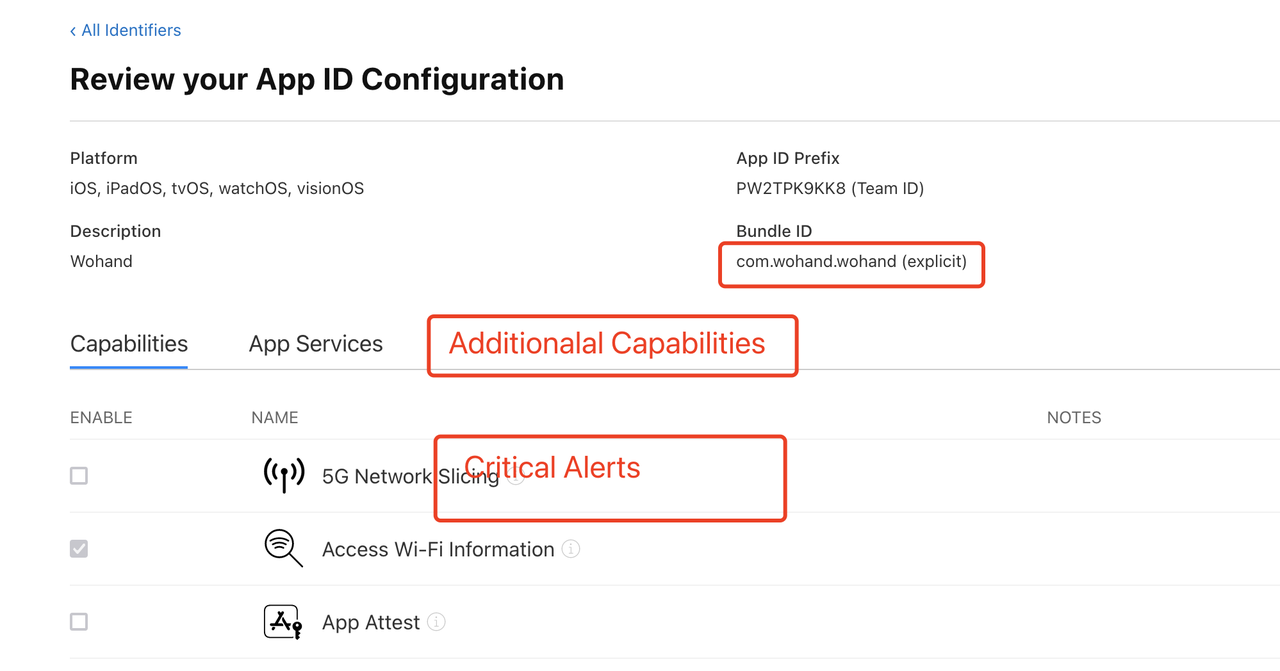
查看权限
在设置UNUserNotificationCenter中增加criticalAlert
func requestAuthorization(completion: ((Bool, Error?) -> Void)?) { let options: UNAuthorizationOptions if #available(iOS 12.0, *) { options = [.alert, .badge, .sound, .criticalAlert] } else { options = [.alert, .badge, .sound] } UNUserNotificationCenter.current().requestAuthorization(options: options) { (granted, error) incompletion?(granted, error) } }
然后在app.entitlements中增加keycom.apple.developer.usernotifications.critical-alerts类型为boolean 并将值设为1
Critical alerts APNS 格式
最后,需要在从服务器发送推送通知时修改 APS,可以加入声音键对象。
{ "aps":{ "alert": "This is a Critical Alert!", "badge": 1, "sound": { "critical": 1, "name": "your_custom_sound.aiff", "volume": 1.0 } } }
添加自定义声音文件(.aiff 格式)并指定设备音量(值 0.0 到 1.0),其中 1.0 表示全音量。
如何测试紧急通知
工具下载:
Push Notifications
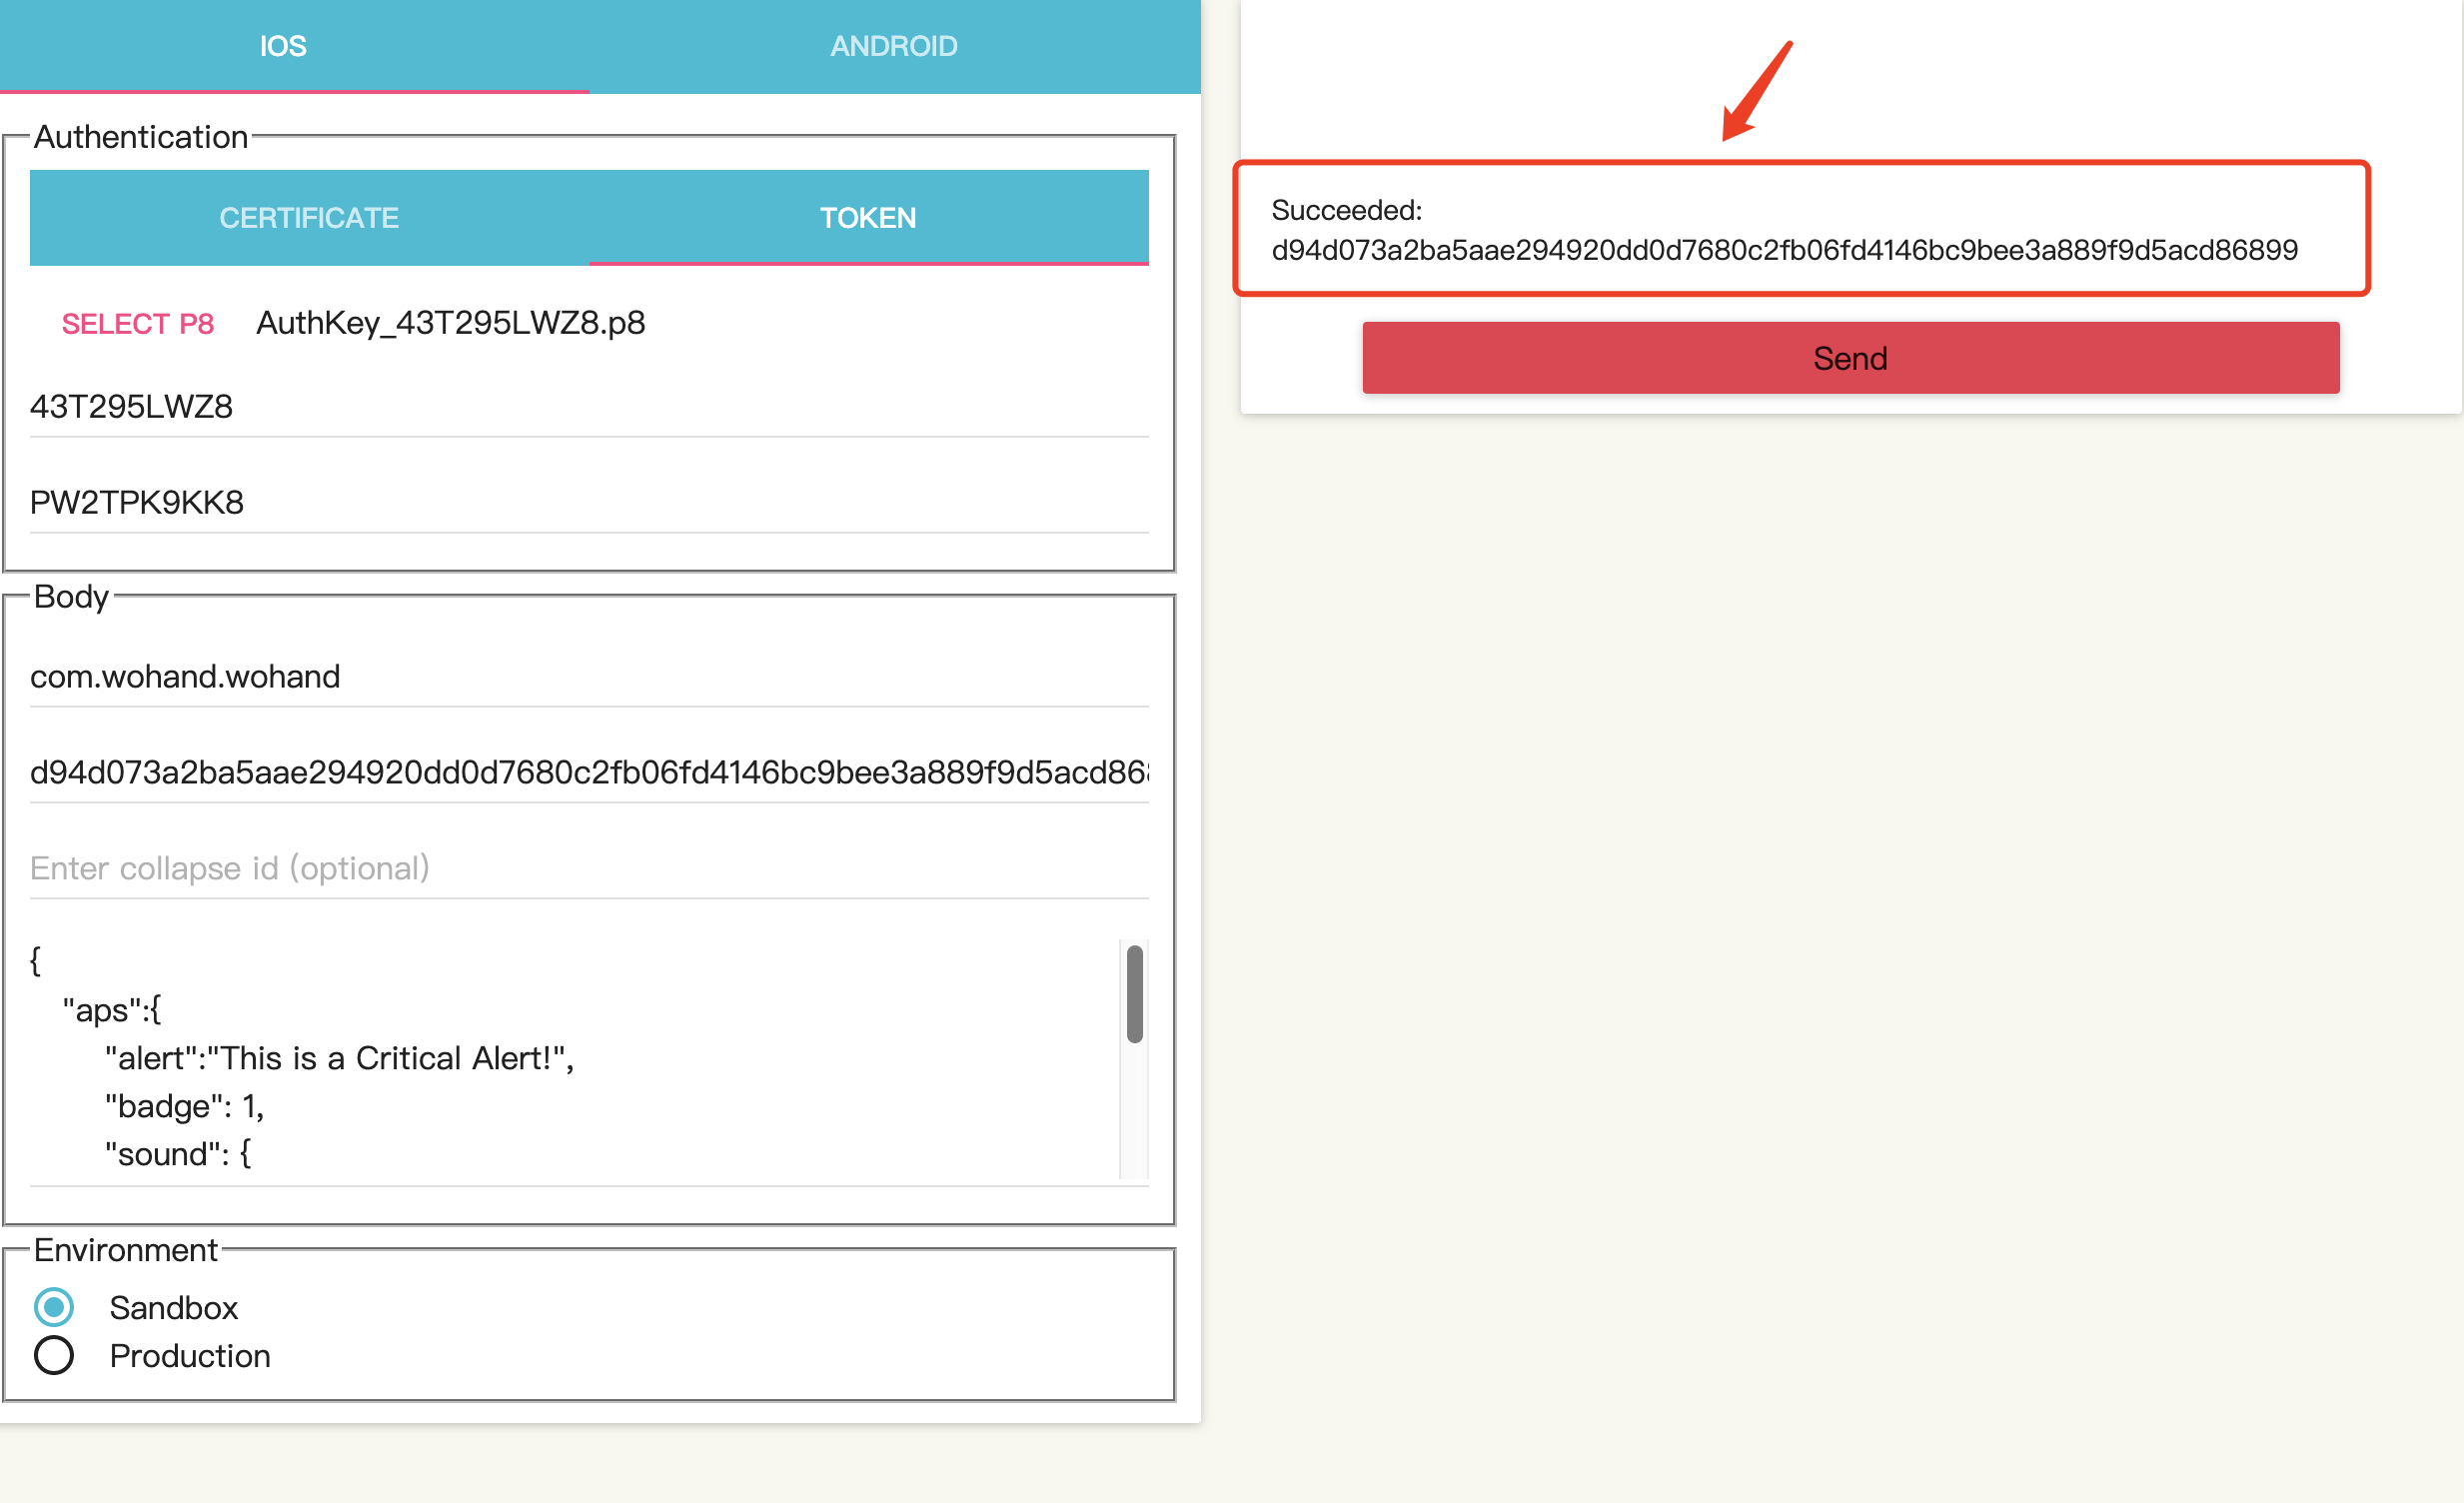
工具界面:
需要的参数配置:
-
.p8
-
key ID
3.team id:
4:bundle id :
5.device token:
代码里获取 ===device token:===d94d073a2ba5aae294920dd0d7680c2fb06fd4146bc9bee3a889f9d5acd86899
    func application(_ application: UIApplication, didRegisterForRemoteNotificationsWithDeviceToken deviceToken: Data) {
        print("===device token:===\(deviceToken.hexString)")
        // 记录/获取推送token,发生改变则将token上传
        if UserDefaults.standard.object(forKey: "lastSnsToken") == nil {
            WoUser.currentUser.needUpload = true
            UserDefaults.standard.set(deviceToken.hexString, forKey: "lastSnsToken")
        } else {
            let lastSnsToken: String = UserDefaults.standard.object(forKey: "lastSnsToken") as! String
            if lastSnsToken != deviceToken.hexString {
                WoUser.currentUser.needUpload = true
                UserDefaults.standard.set(deviceToken.hexString, forKey: "lastSnsToken")
            } else {
                WoUser.currentUser.getUploadUserInfoTag()
            }
        }
//        Replies.didRegisterForRemoteNotifications(withDeviceToken: deviceToken)

    }
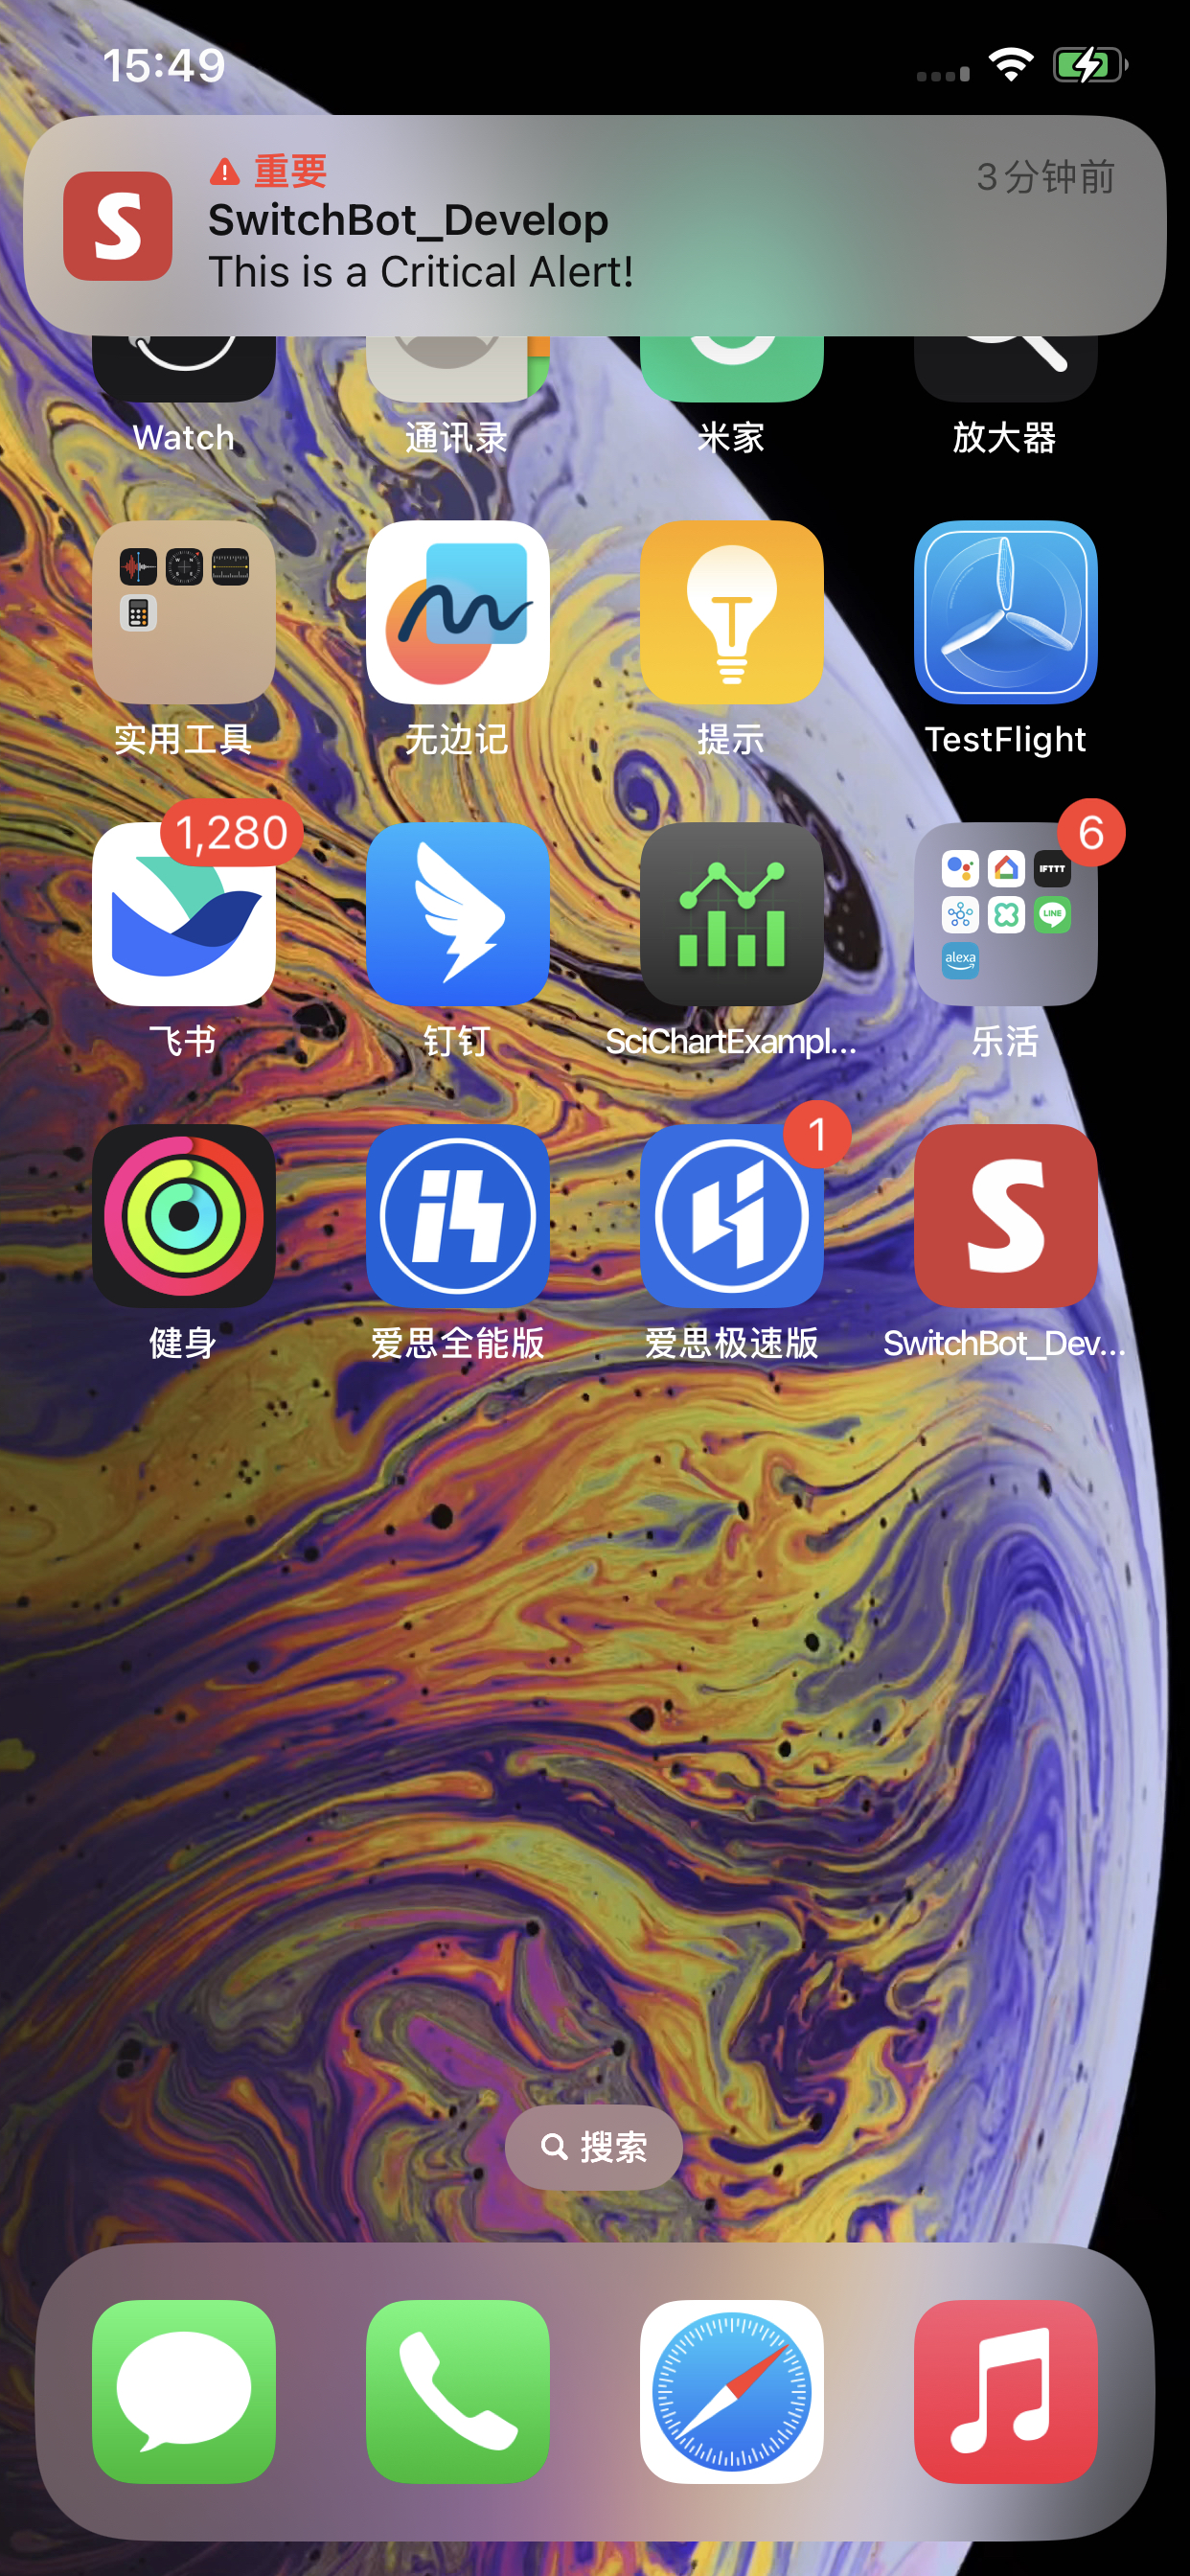
发送成功结果:


 發表於 2023-11-16 15:08:00